We check, repair and change the ignition switch on the domestic “Ten. We check, repair and change the ignition switch on the domestic “Ten” How to install the ignition switch 2110
To start the VAZ 2110 engine, an ignition switch is used, the malfunction of which completely paralyzes the operation of the entire car. In addition to starting the engine, the ignition switch serves as additional protection against theft, since to activate it it is necessary to use a key that only the owner has. The lock also blocks the steering wheel from turning if there is no key in it, which prevents the car from being rolled or towed. Of course, the lock is not capable of providing complete protection, but it can detain intruders, which is sometimes decisive for saving the car.

The essence of the ignition switch is to close and open the contacts of the vehicle's electrical system. It is quite reliable and has a long service life, but sometimes needs to be replaced for a number of reasons:
- breakdown of the lock contact group;
- mechanical damage;
— loss of the ignition key.
If the reason for replacing the ignition switch of a VAZ 2110 is the loss of the key or damage to the lock during an attempt to steal, then there is no need to completely change the entire mechanism. You can simply purchase a cylinder - the part of the lock into which the key is directly inserted. The cylinder is sold together with a new set of ignition keys, which are necessary to turn it. This way, you can carry out repairs without a complete replacement, which will cost a little less.

When replacing the cylinder, please note that in this case the old key will be used for the doors and trunk, and a new one for the ignition. Therefore, if this is unacceptable, then you need to buy a new lock with an additional set of cylinders for the doors and trunk, which will allow you to open everything with one key.
If the reason for the replacement is a breakdown of the lock contact group, then a new cylinder will not help and the entire mechanism needs to be replaced. On average, the price of a new lock fluctuates around 800 - 1000 rubles, and with additional cylinders a little more. Replacement at a service station will cost on average another 500 rubles. But if the car does not start, then you will not be able to get to the service station on your own, then you can carry out a replacement yourself.
Lock replacement steps
And now about how to change the ignition switch on a VAZ 2110. The replacement process is quite simple and does not require special skills. The main thing is to do everything carefully so as not to confuse anything, because otherwise it will not be possible to start the engine. To work, you will need a simple set of tools, which can be found in the trunk of every VAZ 2110 owner. It includes:
- Phillips screwdriver;
- 10mm spanner or open-end wrench;
- pliers;
- hammer;
- thin chisel.
The first step is to disconnect the terminals on the battery to avoid a short circuit. After this, use a screwdriver to unscrew the screws holding the lower plastic steering column cover.
After removing the lower and upper parts of the casing, the steering column will open, on which the lock is secured using a special bracket. For easy access to the bracket, you also need to disconnect the left lever for switching turns.

It can be removed in just a few seconds; to do this, you need to disconnect the plug with wires from it and pull the switch itself to the left in the direction of the driver's door.
The switch will come out through a special groove, so you don’t need to unscrew anything. The plug must be pulled out carefully so that the wires do not fall out, which will lead to their mixing.
Once you get rid of these parts, you can easily disconnect the ignition switch connector that connects the wires. Next comes more rough work, which consists of unscrewing the bolts that tighten the bracket with the lock on the steering column. Since, to increase security against theft, these bolts have a round head without edges that cannot be easily unscrewed, you will need to use cunning and force.
To do this, resting the head of the bolt with a chisel at an angle, you need to hit it. The angle must be set so that the bolt rotates counterclockwise. The chisel must be sharp so that it can cut into the surface of the bolt head and provide a reliable grip.
After removing the old lock, a new one is installed in its place, complete with clamping bolts. These bolts have a breakaway head, so they should be tightened until it falls off.

You should not use regular bolts, since they are easy to remove and it may take less time for attackers to steal a car.Before installation, you must turn the key in the lock to the " I", which will allow the steering shaft locking clamp to enter the housing and not interfere with installation.
After installing a new lock, you should not immediately tighten the bolts completely, since you need to make sure that its body is in the correct place and the locking mechanism is working.
What are autobuffers and why are they needed: let’s find out together? Read more in our article
Contract engine: what is it and how to choose.
Having returned the turning lever to its place, you can connect the terminals to the battery and check the functionality of the lock. If everything is done correctly, starting and shutting down the engine occurs without problems, then you can tighten the bolts until the head comes off and attach the steering column protective cover in place.
Replacing the ignition lock cylinder of a VAZ 2110
If it is necessary to replace only the cylinder, then you need to remove the lock from the steering column as described above. This process is a little more involved and time consuming, but can save you the cost of purchasing a new ignition switch.
On the side of the tension bracket, you need to unscrew the screws that connect the two halves of the lock body. After removing them, the body can be divided into two parts. The front part hides the larva, so it needs to be pulled out. The new cylinder does not include some small parts, such as a return spring and a locking ball, so they need to be transferred from the old one. The return spring is located in the lower part of the cylinder and is immediately invisible. After installation in the new cylinder, the spring must be cocked to the same position as it was in the old one.
When purchasing a separate cylinder, it does not come with breakaway bolts. Therefore, if you cannot get them, you can use M6 bolts 20 mm long. But in this case, they can always be quickly twisted, which will reduce the safety of your car. Of course, in the future, if you need to re-repair or replace the ignition switch, the work will be easier and the chisel will no longer be needed.
Video on how to replace the ignition switch on a VAZ 2110
Bottom line
Thus, for such a replacement there is no need to contact a car service, since everything can be done independently. The main thing is to approach this issue carefully so as not to confuse anything, especially when replacing the cylinder, since you need to rearrange several small parts, including a spring and a ball, which can be dropped and lost. And don’t forget to check the functionality of the mechanism before tightening the breakaway bolts.
If the ignition switch fails, there is no time for jokes. In fact, without the functioning of this unit, you will not be able to start the car. Unless you use the method from movies, where the main characters rummage through the wires under the steering wheel, connect a couple of wires and start the car. And then, it’s far from a fact that it will work on your top ten.
Therefore, let’s better discuss the real problems with the lock, talk about the principle of its operation, the features of pinout and replacement.
Device Features
Let's start with some basic things you should be aware of before embarking on a replacement or repair.
- The ignition switch (IZ) is the main element of the vehicle starting system. You will not be able to start the engine without it.
- The lock has a built-in anti-theft system. Therefore, if the protection does not work, the risk of becoming a victim of car thieves increases significantly.
- The ZZ is capable of blocking the starter from being turned on again, but without initially turning off the ignition.
- For tens, the key can be removed from the lock when it is in the “zero” position. By taking it out, you will thereby extend a special rod, which is responsible for the anti-theft functions.
- If the key moves from position zero to “one”, then the locking rod goes away and the ignition contacts close.
- When the car is started, all electrical equipment receives power and is energized. This applies to the dashboard, headlights, generator, windshield wipers, power windows, heater, turn signals, etc.
- By turning the key to position “two”, you thereby close another group of contacts, which makes it possible to apply voltage to the starter relay. This will start the engine and you can drive.
Reasons for replacement
It is necessary to replace the entire lock or just the contact group, depending on the nature of the breakdown and the situation with your car. Therefore, we will consider options when replacement may still be required.
|
Reason for replacement |
Your actions |
|
There was an attempted theft, as a result of which the integrity of the lock was compromised |
In this case, only the contact group and the cylinder can be replaced, since the lock itself is most likely intact. Lower costs and required repair efficiency. Although experts advise purchasing a new lock right away and installing it |
|
The keys were lost and there was no spare |
There is no point in trying to find a master who will turn you exactly the same key as before. You will have to purchase a lock and install it on your car |
|
Problems with contacts or contact group |
It is not difficult to check whether this is really the problem. Turn off the battery by disconnecting the negative terminal, then remove the cover under the steering column and check the wires for resistance. Switch the key alternately to positions 1,2 and 3, while measuring the resistance. If the ohmmeter shows "zero", then the lock really has a problem and needs to be replaced. |
|
There was a desire to improve the castle |
Often, car owners replace the standard ignition with a more modern one, equipped with lighting. It is not expensive, but it is convenient to use in the dark. No need to fumble for the key slot |
When checking the contact group, be sure to disconnect the negative terminal from the battery, otherwise a short circuit will occur, and not only the contactor will have to be replaced.

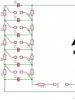
Circuit and pinout
First of all, get acquainted with the lock diagram and wire connection diagram, which will allow you to better understand the features of the 3Z pinout.

As you can see, the pinout includes 8 elements. What does each of them mean and what functions is it responsible for? We'll figure out.
- Power supply for the inserted key sensor microswitch (+12Volt).
- Power supply to ground when doors are opened on the driver's side.
- Power supply that supplies current to the starter (+12Volt, pin 50 on the diagram).
- Source at +12Volt. Activated after turning on the ignition. Power supply for additional equipment, such as video recorders, clocks, etc. (pin 15 in the diagram).
- Source at +12 Volts. Triggers when the key is inserted. Goes to pin 5.
- Power supply +12Volt. The illumination of the 3Z larva is activated.
- +12V source from the battery (pin 30 in the diagram).
- Not active.

Dismantling
If previous activities have shown that intervention in the design of the ignition switch is required, work in any case will begin with dismantling the device.
We have special step-by-step instructions for this.
- To begin, disconnect the negative terminal from the battery of your VAZ 2110. This way you will ensure your safety and the safety of all wiring. You know what the consequences of a short circuit are.
- Next, remove the casing on the steering column. This is how you gain access to the castle.
- If you feel that the rotary switches will interfere with your work, it is better to remove them immediately. The work does not last for a couple of minutes, so all irritants should be put aside.
- Armed with a chisel and hammer, unscrew the mounting bolts with round heads. Don't get confused, they are the only ones there. Try to perform this operation as carefully as possible so as not to knock off the bolt head.
- Now take the pliers and remove the bolts.
- Insert the key into the ignition and turn it to position zero. This will disable the anti-theft system.
- Next in line is the bracket that held the previously removed bolts and the ignition switch itself.
- Mark the contact wires using different colored markers. Otherwise, you can easily mix them up during reassembly.
- Often it is not necessary to completely replace the lock, but only partial repairs. For example, change the backlight bulb, or fix a microswitch problem.
- Disconnect the connectors that used to operate the ignition switch.
- To replace the backlight bulb, disconnect the corresponding connectors, and then use pliers to remove the bulb.
- To replace the contacts, use a screwdriver to press out the special latches.
- Using a shaped screwdriver, unscrew three screws, after which you can remove the rod.
- Use a regular flathead screwdriver to pry out the clips and remove the microswitch.
- Next, new elements are inserted in place of the dismantled elements.

Installation
Now that all preliminary repair work has been carried out, there are two options:
- Install a completely new ignition switch with wires and contacts, since the old one is unsuitable for further use;
- Return the old lock to its place, since the repairs have borne fruit.
Before installation, be sure to purchase special bolts equipped with break-away heads. They are designed to prevent your vehicle from being stolen.
Regardless of the option, the lock installation sequence is identical.
- Insert the key into the ignition, then turn it to position one.
- Secure the bracket to the steering column, and then replace the mounting bolts.
- Remove the key from the lock and check that the shaft lock works properly. If it's a new lock, there shouldn't be any problems. If we are talking about a refurbished old one, troubles may arise, since in reality it is better not to skimp and immediately replace the spare parts with a device of good quality.
- If everything works as it should, then you can complete the installation of the lock by tightening special bolts that are equipped with tear-off heads.
Buy only high-quality locks from trusted suppliers. Today there is an impressive number of fakes on the market, which use materials and components of dubious quality. Because of them, you can be seriously injured and even lose your car.
At the moment, the cost of a new ignition switch is about 20-25 dollars. These are small expenses, but sometimes simply necessary. Whether to do the repairs yourself or trust the car to a service station is a personal choice for everyone.
The VAZ 2110 ignition switch cannot be called a reliable part, especially when you compare its service life with the same devices on cars of foreign origin. Therefore, owners of the tenth - twelfth model, who use the car for a long time, sooner or later encounter problems with the lock and its repair. On the other hand, the element can be easily removed from the car and every skilled motorist can replace it. But first you should figure out whether the entire part needs to be replaced, since in most cases it can be repaired.
Reasons for replacing the ignition switch
There are 3 main reasons leading to breakdowns of this device:
- mechanical wear as a result of long-term use;
- problems with the electrical part of the lock;
- damage due to attempted burglary and car theft.
Reference. The first troubles associated with turning on the ignition and starting the engine may appear after three years of operation of the VAZ 2110-2112.
Appearance of the ignition switch VAZ 2110-2112
Not every one of the listed reasons leads to a complete replacement of the element; sometimes you can get by with “little loss” by changing one of its parts. To determine this issue, you need to diagnose the signs of a malfunction:
- Contacts are burnt or oxidized. In this case, the mechanical part works, but the electrical part does not. The problem is solved by cleaning or replacing the contact group.
- The key gets stuck in the slot, after starting the engine it is not thrown back and you have to turn it by hand. These are malfunctions of the core (larvae) and the ejection spring, which can be completely repaired.
- Obvious mechanical failures of the locking tongue (the steering wheel is very difficult to rotate), jamming or cracks in the housing are a reason to replace the entire ignition switch.

In the event of a mechanical failure, the key may not turn or may not be released by the spring.
A separate issue is the loss of all keys by the owners. It can be solved in two ways - by replacing the entire device or the key turning mechanism - the cylinder. For obvious reasons, the second option will be cheaper, especially if you do the work yourself.
Reference. As practice shows, the mechanical insides of an element can be broken by an ignorant driver who has lost his keys and is trying to unlock the steering wheel in order to start the engine by shorting the wires. There is a more elegant way - to remove the lock, and only then connect the wires of certain colors, as described below.

Checking the lock contact group with a multimeter
A faulty contact group can be easily diagnosed if you have a multimeter or other device with a resistance measurement function in your household. To do this, you need to get to the connector located under the plastic frame of the steering column and disconnect it. Then use a multimeter to measure the resistance between all contacts in the block, turning the key to different positions. Depending on the result, the following conclusions are drawn:
- the device shows infinity - the contact group is out of order and needs to be replaced;
- some resistance value indicates burnt or oxidized contacts, try to clean them;
- zero readings on the device indicate that the electrical part is fully operational.

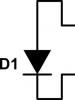
VAZ 2110 ignition switch diagram
Important! You need to measure the resistance in the block whose wires come from the ignition switch (male connector), do not confuse it with other contacts connected to the car’s on-board network.
Instructions for removing the element
For disassembly you need to prepare a simple set of tools:
- 10 mm head and ratchet drive;
- Phillips screwdriver;
- narrow chisel (width 5-8 mm);
- hammer;
- round nose pliers with tapered, curved ends.

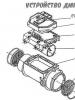
Ignition switch replacement tool
To successfully install a new or repaired lock in place, it is advisable to purchase 4 special fastening bolts with M6 threads with a head size of 10 mm and a length of 20 mm. Their feature is the heads that come off with a key at a certain tightening torque. After tearing off the heads, semicircular caps remain on the surface, which are much more difficult to unscrew for an untrained person. But you will have to do this during disassembly.

The battery must be disconnected before starting work.
Like any event related to tampering with the electrical part of the car, dismantling the ignition switch begins with disconnecting the negative terminal of the battery. Then proceed in this order:
- Using a Phillips screwdriver, remove the screws holding the two halves of the plastic frame of the steering column together.
- Lower the handle that fixes the position of the steering wheel during adjustment all the way down and remove the plastic panels. Disconnect the ignition switch block and carefully cut the tape connecting your bundle of wires to the common harness. In order not to cling to the steering column switch during operation, it can also be pulled out of the connector.
- On the metal casing of the steering column you will see a lock mount consisting of two clamps. They are held together by 4 bolts with the heads torn off (visible on the left side). Pointing the chisel at the semicircular caps, use a hammer to loosen the tightening of these bolts one by one.
- Using pliers and then your hands, unscrew all 4 bolts and remove the ignition switch.

Unscrewing the plastic steering column cover
Note. There are “dozens” in which not all the bolt heads are torn off during assembly. This simplifies the matter; the fasteners can be easily unscrewed with a 10 mm socket.

Bolts with intact heads can be unscrewed with a wrench
At the stage of disconnecting the connectors, it becomes possible to check the functionality of the contact group by measuring resistance, as described in the previous section. If you remove the lock because you lost the keys and want to move on, then after dismantling you need to do the following:
- On the “mother” block, which remains hanging after the lock is turned off, find contacts with thick wires of purple and blue color (the latter with a black stripe).
- Connect these terminals with any conductor, after which the ignition will turn on.
- The thick red wire leads to the starter. To start, its contact must be temporarily connected to the installed jumper. When the engine starts, the red wire must be disconnected.

This is how jumpers are inserted into the block to start the engine without a key.
Advice. It is more convenient to look at the colors of the conductors on the harness of the removed device, and then find them on the “mother”.

After unscrewing the fasteners and disconnecting the wires, the lock can be easily removed from the car
Assembly is carried out in the reverse order, but taking into account the following precautions:
- do not tighten the fastening bolts until you have accurately aligned the position of the lock on the casing so that the facing plastic panel fits smoothly into place;
- before final tightening the bolts, make sure that the lock snaps into place when turning the steering wheel, otherwise adjust the position of the lock;
- The tightening torque should be such that the heads of the new bolts come off and the round heads remain.

When installing and tightening the bolts, their heads should come off
If you think that special fasteners are not an obstacle for car thieves, then you can screw in regular M6 threaded bolts and carefully tighten them.
Dismantling the VAZ 2110 lock in the photo
This connector must be disconnected in order to remove the lock. The steering column switch can be easily removed from the socket. Appearance of the mount. It can be seen that not all the bolts are broken. Bolts without heads are torn out of place with a chisel. After unscrewing, the left fastening clamp is removed. The lock with the right clamp is held on by wires that need to be disconnected. After the bolts are torn off with a chisel, they can be easily unscrewed with pliers
Training video on replacing the ignition switch
Replacing the contact group
In the event that, as a result of diagnostics, a malfunction of the contact group is detected, you will still have to remove the ignition switch, since it will not be possible to get to it in any other way. After removing the element, disassemble it using the following algorithm:
- Disconnect the connectors with the backlight power wires.
- Remove the decorative plastic cover by releasing the 4 latches. Work carefully because these clips are easy to break off, and buying a cover separately is quite a task. It is not advisable to change the entire lock because of it.
- By bending the 2 clamps holding the contact group, remove it from the ignition switch.

The plastic cover can be removed using a screwdriver
Note. You will additionally need a small flat-head screwdriver as a tool to bend the latches.

The contact group is located immediately under the cover
First of all, examine the status of the contacts. If they have darkened (oxidized), then clean the current-carrying surfaces with fine sandpaper P1000. Then put the group in place and, without installing the lock, connect it to the vehicle's on-board electrical system to check its functionality. If unsuccessful, the part must be replaced. The same will have to be done if the contacts are burnt or the group does not work without any external signs of malfunction.

The part is removed after bending two latches
Installation of a new larva
To replace the lock core due to mechanical failure, remove it from the vehicle as described above. Then follow this algorithm:
- Insert the key into the slot and use a Phillips screwdriver to unscrew the 3 screws holding the 2 halves of the lock body together.
- Separate the housing while holding it with the key facing up. If you hold the lock in a different position during disassembly and do not insert the key, the insides will spill out and you will not understand how to put them back together. In this case, the ball with springs may get lost.
- Remove the locking mechanism, which consists of two spring-loaded parts, and pull out the spring itself.
- After removing the key, carefully remove the core so that the ball with the spring (located on the side of the cylinder) is not lost.

To disassemble the case, you need to unscrew 3 screws
Before replacing, it is necessary to remove the return spring from the old cylinder, since it is not sold complete with a new core. The spring is inside the part on the back side in a cocked state; it must be installed in the same form on the new cylinder. Also, do not forget to remove the thin spring from the hole where the ball is inserted.

The locking mechanism tongue peeks out from the bottom of the case
Important point. Remember that if you replace the core because it is broken, the new key will no longer fit the door lock. There are 2 options: use two separate keys or simultaneously change the cylinder in the door. The last method becomes the only applicable one when all the keys are lost.

The larva must be pulled out so as not to lose the details
When installing the core, you need to move the spring for the ball into the hole and insert the part into the body. Then push the larva all the way, while simultaneously inserting the ball into the socket. After that, all that remains is to assemble the locking mechanism and tighten the housing with screws. When finished, check the operation of the ignition switch by turning the key to different positions.

The ejection spring from the old core needs to be moved to the new one
How the larva changes - video
The video demonstrates how to disassemble the mechanical part of the ignition switch of a VAZ 2170 (Lada Priora), but in design it does not differ from the elements installed on VAZ 2110-2112 cars.
As a rule, there is no need to change the entire ignition switch, although car enthusiasts often resort to this option to save time. The operation will take the technician at the service station no more than 20 minutes. Replacing it yourself will require more time, but you will be able to replace only the broken part (cylinder or contact group), thereby saving personal funds.
Egnition lock- plays an important role in the “life” of the car, faulty ignition switch will not allow you to start the engine, therefore, it is unlikely that you will be able to drive far in such a car. Among other things, the ignition switch plays the role of protecting the car, like any lock it obeys only the one who has the key, however, nowadays even sophisticated anti-theft systems, let alone some simple ones, do not stop car thieves Ignition switch VAZ 2110 which is what we will be talking about today.
In fact, egnition lock- this is nothing more than a breaker that opens or closes the groups of contacts necessary for engine operation; a malfunction of this unit will increase the chances of your car being stolen, and will also create a lot of trouble for you at the most inopportune moment.
Replacing the ignition switch of a VAZ 2110 is done for the following reasons:
- After ;
- When a car owner has lost his key;
- In case of failure of the contact group.
 The car may not start due to poor contact, which can be checked quite easily. To do this, just disconnect the negative terminal on and remove the lower casing on the steering column. Then you need to disconnect the contacts and check using an ohmmeter. The contacts being tested must have zero resistance, but if this is not the case, it is absolutely necessary.
Replacing the VAZ ignition switch - cylinder or contact group
Replacing the ignition switch VAZ 2110 A new one is only necessary if it is completely out of order or has serious mechanical damage; in other cases, you can try to replace the failed parts of the lock. If you just need to restore egnition lock, for example, after they tried to steal a car or in the case when the key began to turn poorly in the keyhole, then most likely it will be possible to limit ourselves to only partial repairs, that is, replacing the ignition lock cylinder. Replacing failed elements is quite simple, and every motorist with minimal skills can handle it.
From the tool you will need:
- Hammer;
- Screwdriver;
- Chisel;
- The key is "10".
Replacing the ignition switch on a VAZ 2110 step by step instructions
The first thing that is necessary before changing the ignition switch of a VAZ 2110 is to turn off the power to the car. To do this, disconnect the negative terminal on the battery, then remove the steering column cover. In order to facilitate the procedure for replacing the cylinder, it is necessary to remove the ignition switch, then replace the faulty cylinder with a working one and put the lock back.
 If we talk from a financial point of view, we can say that replacing the contact group is the most profitable. The disassembly principle is somewhat similar to the previous one; you will also have to remove the casing and lock. In order to avoid any unpleasant moments, I advise you to mark all the wires being removed when disconnecting the contact group; this will allow you to avoid confusion and save your time. Some cars have a retaining ring in the contact group, which you will need an awl to remove. After replacing the contact group, do not forget to return the retaining ring to its place.
Replacing the ignition switch of a VAZ 2110
To replace the ignition switch of a VAZ 2110 you also won’t need any super abilities, but if you don’t know some of the nuances, you can tinker a lot and get tired.
The ignition switch is replaced as follows:
1. When making a replacement, use special bolts with tear-off heads, which some motorists advise replacing with twenty-millimeter M6 bolts, citing the fact that these are easier to remove if necessary. ignition switch repair. Of course, this is so, but there is another side to the coin: by making it easier to disassemble the ignition switch, you yourself reduce the level of security and anti-theft protection of your car.  2. In order to loosen the bolts, you will need a chisel; when using it, you should be extremely careful so as not to accidentally cut off the bolt head;
3. Before replace the ignition switch VAZ 2110, insert the key into it and turn it to position “I”, this is necessary so that the latch locking the steering shaft mechanism enters the lock body.
 4. After this, you can install the ignition switch on the steering column, and secure it with a bracket and tighten it with new mounting bolts.
5. After removing the key from the keyhole, be sure to make sure that the steering shaft locking mechanism is working. If the shaft lock does not work after a full turn of the steering wheel, you will need to adjust the position of the ignition switch on the steering column until the lock latch fits into the groove on the steering shaft.  6. Once the adjustment is complete and the locking mechanism is working, using a 10mm spanner, carefully tighten the bolts until their heads come off.
That's all I have, now I can say with confidence that replacing the ignition switch VAZ 2110- finished!
The ignition switch of a car is, of course, an important automotive component, since without its participation the car cannot be started, unless by some fraudulent methods.
What is an ignition switch - it is, in fact, just a switch that opens certain groups of contacts that are an important part of the car's starting system. A faulty ignition switch is a great target for car thieves.
Why you may need to replace the ignition switch:
1. When they tried to steal a car, the ignition switch was broken;
2. When the car key(s) is lost;
3. Serious damage to the contact group.
The reason that the car does not start may well be bad contacts, which are quite easy to check. To do this, you need to disconnect the negative terminal on the battery and remove the lower steering column cover. After this, the contacts should be disconnected and checked with an ohmmeter. The selected contacts must have zero resistance, otherwise the lock must be replaced.
Replacing the ignition switch - cylinder or contact group
A complete replacement of the ignition switch is necessary only in case of its complete failure or major mechanical damage. If you just need to restore the integrity of the lock, for example, after an attempt to steal a vehicle or a key turned poorly in the keyhole, it is likely that it will be enough to just do it. The procedure for replacing faulty elements itself is quite simple, and any car enthusiast with “straight hands” can carry it out.
Necessary tool
1. Screwdriver.
2. Hammer.
The first step is to turn off the “minus” on, and then remove the steering column casing. To make it easier to replace the cylinder, you need to completely remove the ignition switch. After this, replace the cylinder and install the lock in place.
Replacing the ignition switch contact group is perhaps the most profitable from a financial point of view. The disassembly sequence is not similar to the previous one, remove the casing and dismantle the lock. When disconnecting a contact group, I recommend marking all the wires being removed in order to avoid getting them mixed up; upon completion of the repair, this will save you from unnecessary headaches. By the way, some models have a locking ring, which requires an awl to remove; after replacing the contact group, do not forget to install the locking ring back.
Not the most difficult procedure, although it, like many others, is not without its own characteristics and nuances, without knowing which you can suffer quite a lot. Replacing the ignition switch on a VAZ 2110 should be done as follows:
- It is imperative to use special bolts with tear-off heads; some recommend replacing them with regular twenty-millimeter M6 ones, but remember that in this way you are reducing the level of anti-theft protection of your car with your own hands;
- To loosen the bolts, you must use a chisel, but be careful not to accidentally cut the bolt head;
- Before installing a new ignition switch, you must insert the key into it and set it to position “I”. This must be done so that the latch, which blocks the steering shaft mechanism, enters the lock body.
- Now you can install the ignition switch with mounting bracket on the steering column and tighten the new mounting bolts.
- After removing the key from the ignition switch, it is necessary to check the functioning of the steering shaft locking mechanism. If the shaft is not locked through a full rotation of the steering wheel, it is necessary to adjust the position of the ignition switch on the steering column so that the lock latch fits into the groove on the steering shaft.
- When the adjustment has been made and the locking mechanism has been checked, using a 10 mm spanner, slowly tighten the bolts until their heads come off.